1. Getting Started
The following sections will help you get started using CanFlood2. We suggest reading these sections first before reading the User Guide or the Tutorials.
1.1. Installation
To install CanFlood2, you first need to install QGIS, then you can install CanFlood2 from the Plugin Repository. For detailed instructions, refer to the project README. For best performance, ensure you have the specified version of QGIS installed.
After installation of the plugin, the ![]() icon should appear on your plugins toolbar.
If you don’t see the icon, first ensure the plugin is checked on the Installed tab of the “Manage and Install Plugins..” dialog, then ensure the plugins toolbar is enabled by right-clicking the QGIS toolbar.
icon should appear on your plugins toolbar.
If you don’t see the icon, first ensure the plugin is checked on the Installed tab of the “Manage and Install Plugins..” dialog, then ensure the plugins toolbar is enabled by right-clicking the QGIS toolbar.
1.2. Overviews
CanFlood v2 is an object-based, transparent, open-source flood risk calculation tool built for Canada’s Federal Guidelines for Flood Risk Assessment. This tool is designed to help you build, run, and evaluate a set of flood risk models from data you provide for your study area. The tool assumes you have a basic understanding of flood risk modelling as described in the Federal Guidelines for Flood Risk Assessment.
1.3. Quick-Start
To start working with CanFlood2, click the ![]() to open the main dialog.
to open the main dialog.
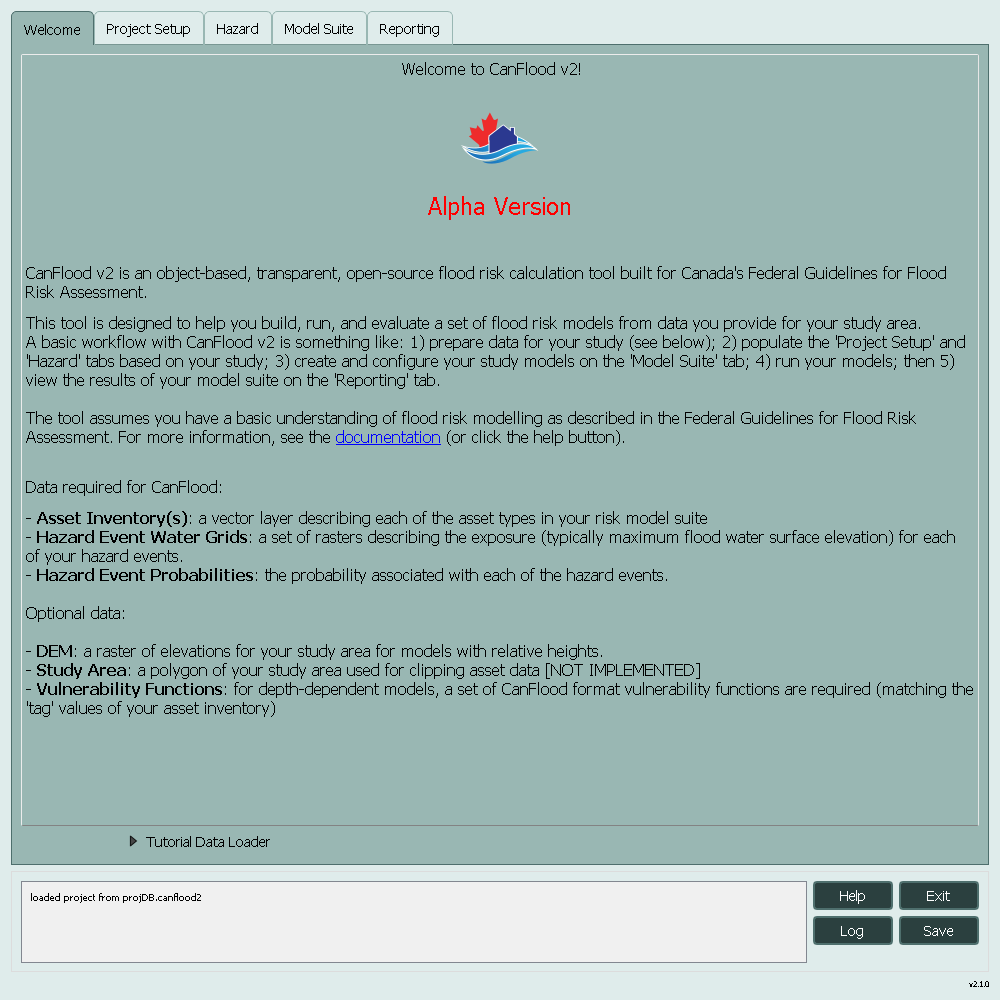
Figure 1.1 Welcome message
Once you have collected and prepared the input data summarized on the welcome tab, the remaining tabs can be used to build, run, and evaluate your flood risk models as summarized in the following sections.
1.3.1. Project Setup
On the Project Setup tab, begin by creating a Project Database File with the New button. Additional optional fields are provided to specify the study area and DEM layers.
Pressing the Save button will save the information you’ve entered so far onto the project database file.
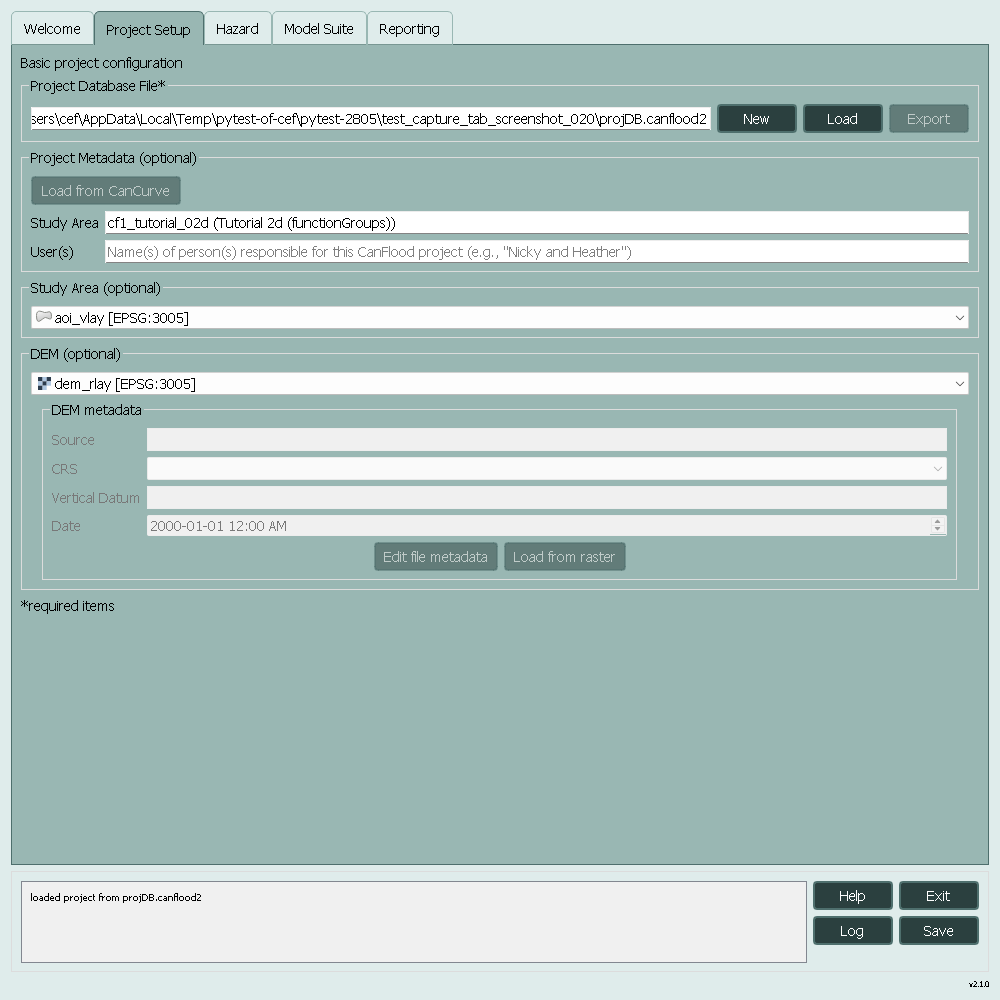
Figure 1.2 Project Setup
1.3.2. Hazard
On the Hazard tab, you can specify hazard layers and metadata to configure the hazard scenario for your models. Once your rasters are loaded into your QGIS project, click the Refresh button to populate the dialog, then select the layers you would like to include in the hazard scenario. Once the layers are selected in the middle pane, use the Populate Table button to create an Event Metadata table of the scenario. Finally, enter the event probabilities (and optional metadata) before again pressing Save to store this information in the project database file.
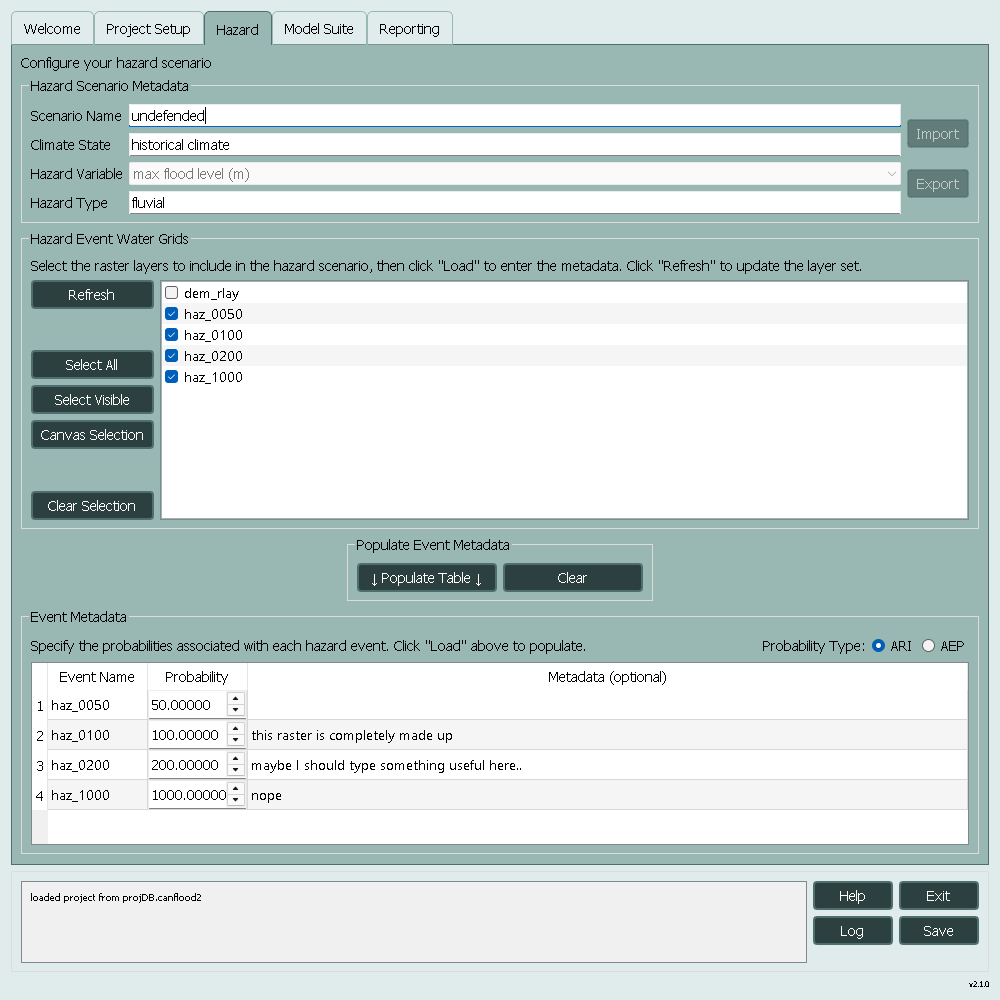
Figure 1.3 Hazard
1.3.3. Model Suite
On the Model Suite tab, you can configure the models included in your analysis. The seven receptor categories described in the Federal Guidelines for Flood Risk Assessment are included in the tool to help you organize your models. Begin by clicking Create Templates to generate a model template for each receptor category. Additional models can be added or removed using the +/- buttons. Each model must then be configured via its respective Configure button, which launches the Model Configuration dialog.
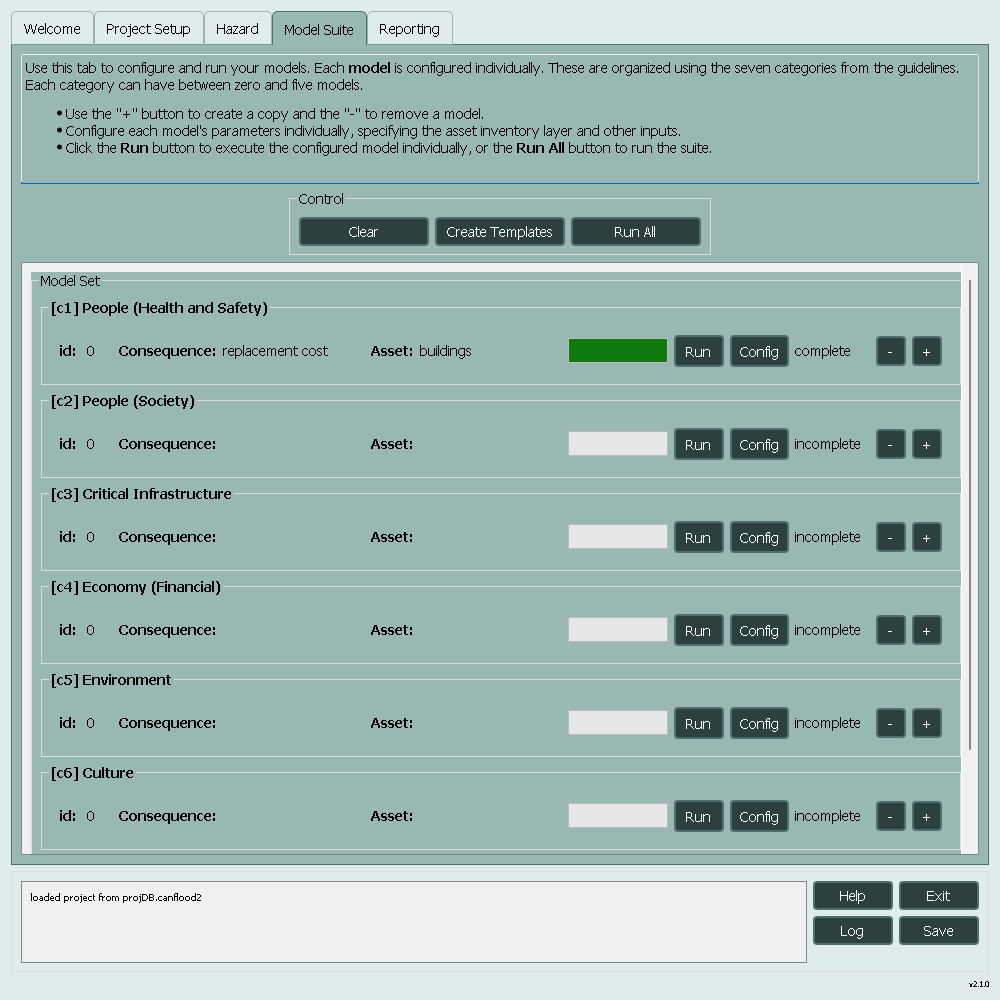
Figure 1.4 Model Suite
1.3.4. Model Configuration
- Begin your model configuration by specifying the Inventory Vector Layer and its key fields:
Index FieldName: the field that uniquely identifies each feature.
Elevation Type: controls whether the values in tghe elevation field are absolute or relative to the DEM.
tag: the field containing the code corresponding to the damage function for that asset.
scale: the field containing the value by which the damage function result should be scaled (e.g., floor area).
elevation: the field containing the elevation or height values of the asset.
cap: the field containing the maximum impact value to allow for the asset (e.g., comlete replacement cost)
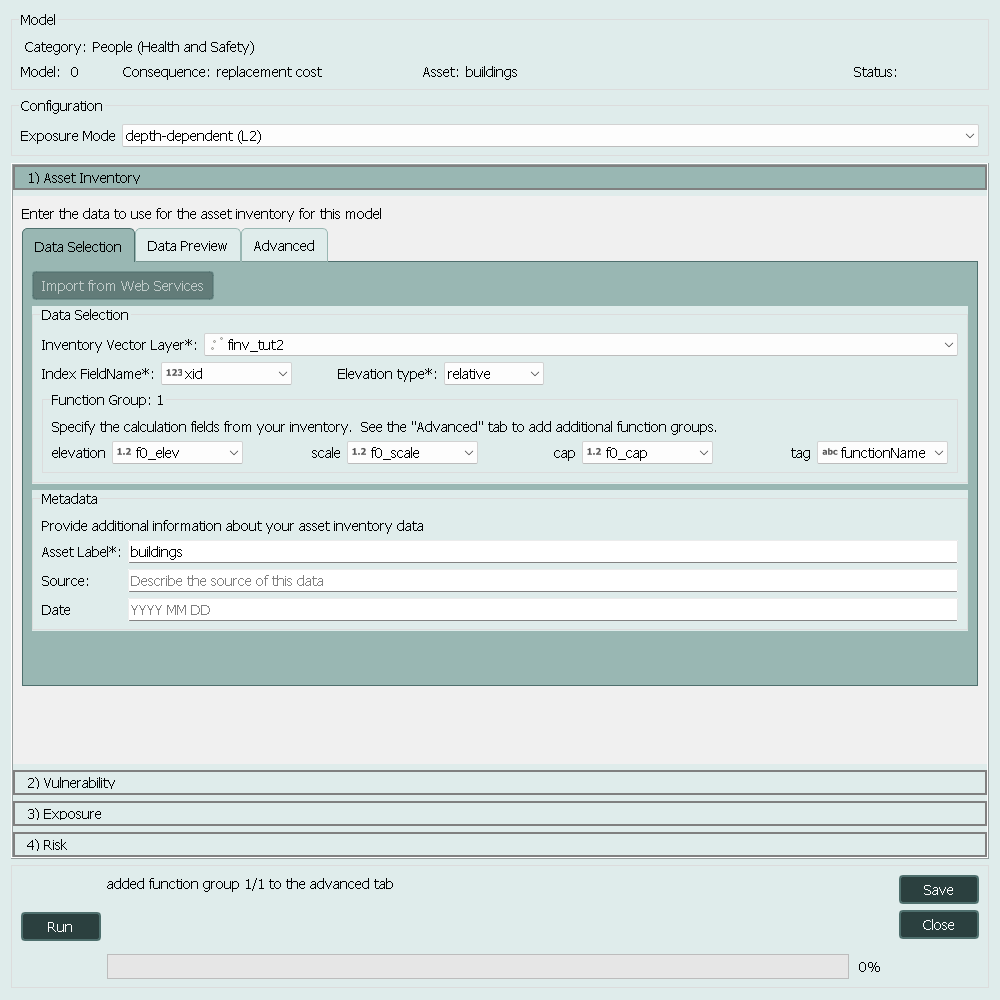
Figure 1.5 Model Configuration - Asset Inventory
Next, the vulnerability or damage functions associated with the asset inventory can be specified on the Vulnerability tab by clicking Load From File and selecting a CanFlood format function database.
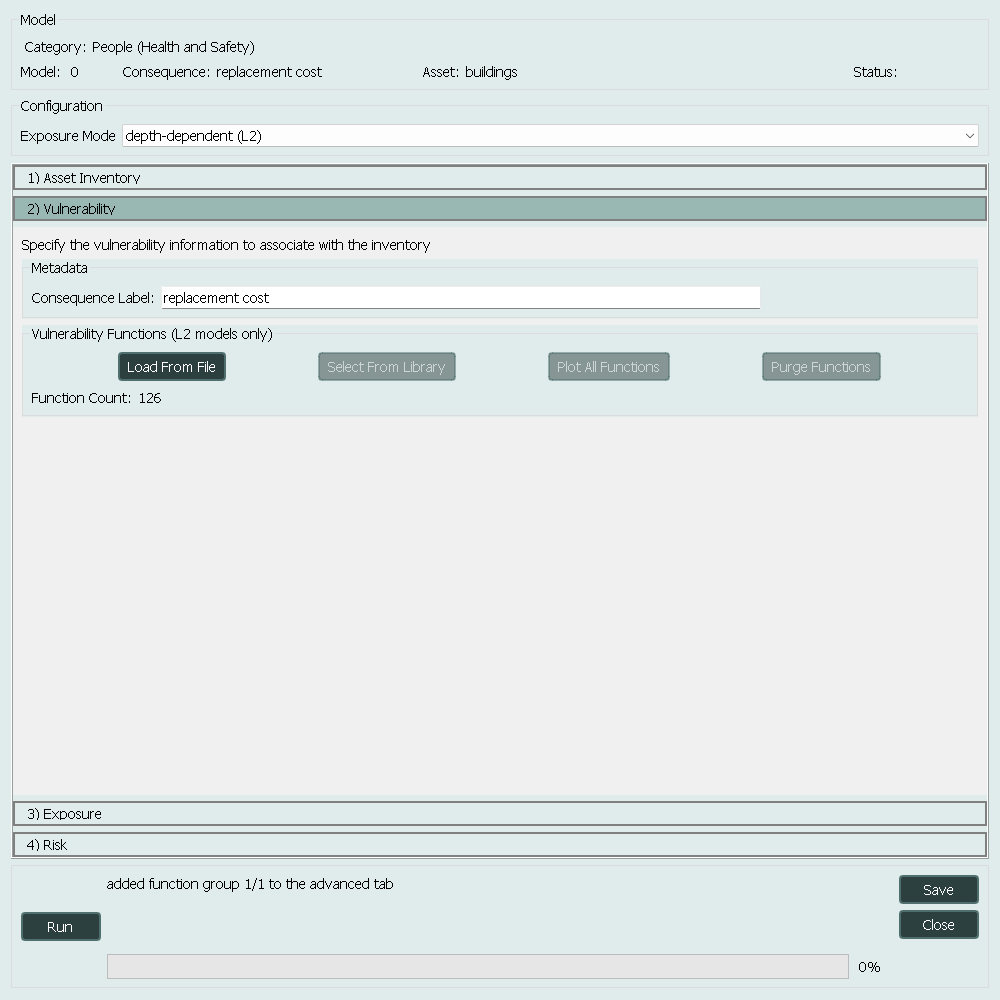
Figure 1.6 Model Configuration - Vulnerability
Next the exposure parameters can be specified on the Exposure tab.
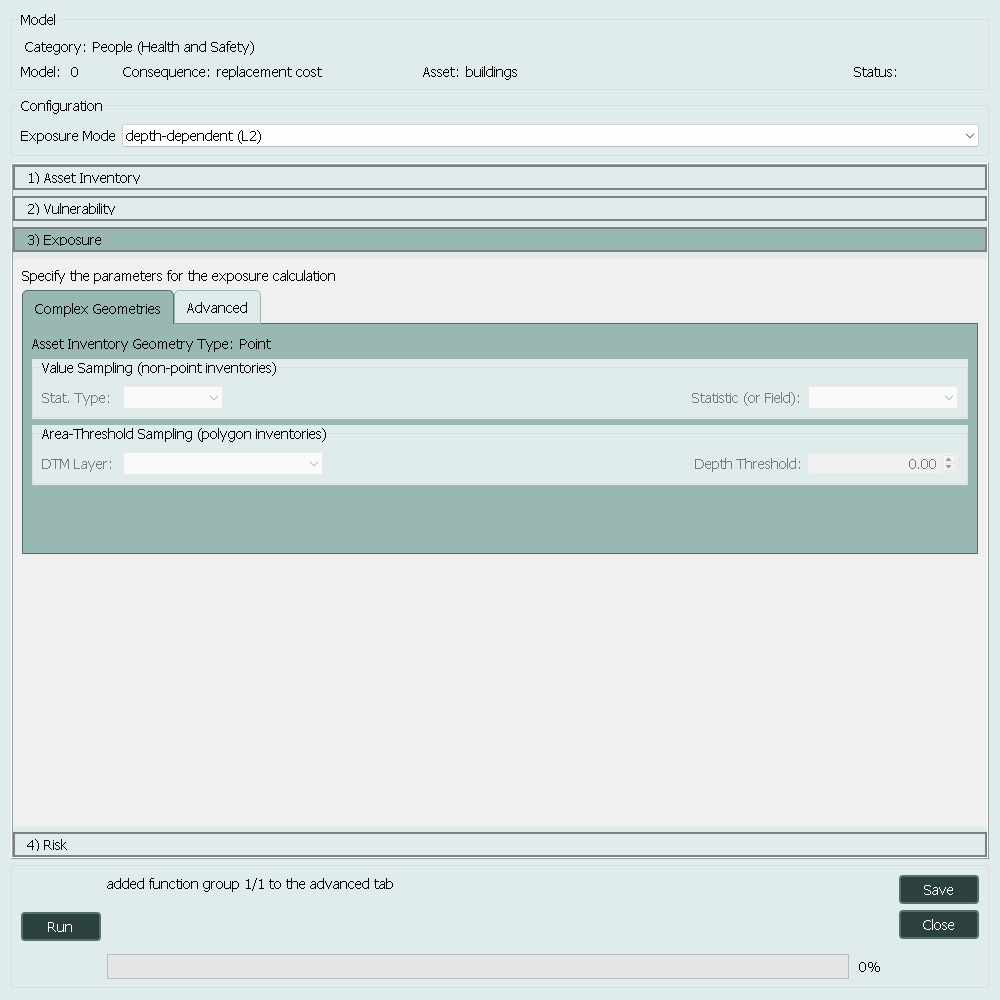
Figure 1.7 Model Configuration - Exposure
Finally, the EAD calculation parameters must be configured on the Risk tab.
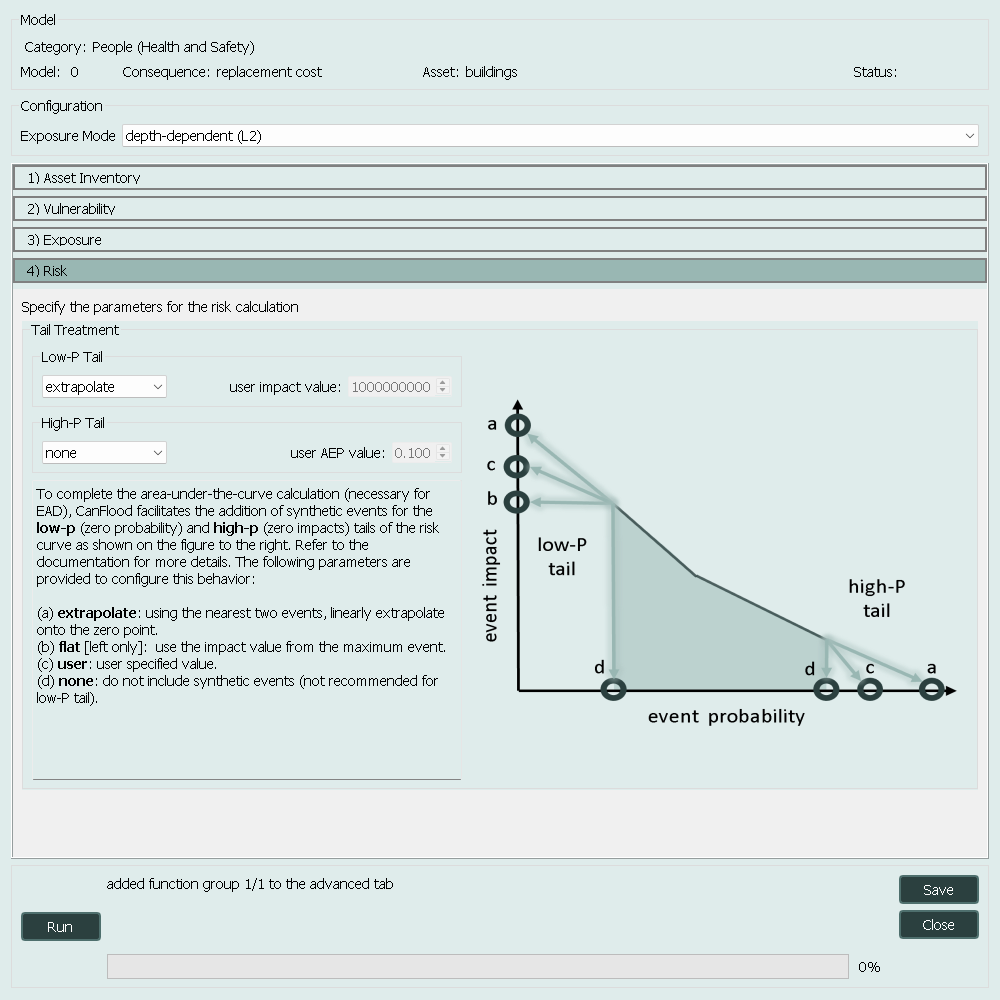
Figure 1.8 Model Configuration - Risk
Once the model is fully configured, it can be run using the Run button on the Model Suite tab.
1.3.5. Reporting
Once your model suite is configured and successfully run, the tools on the Reporting tab can be used to visualize and analyze the results.
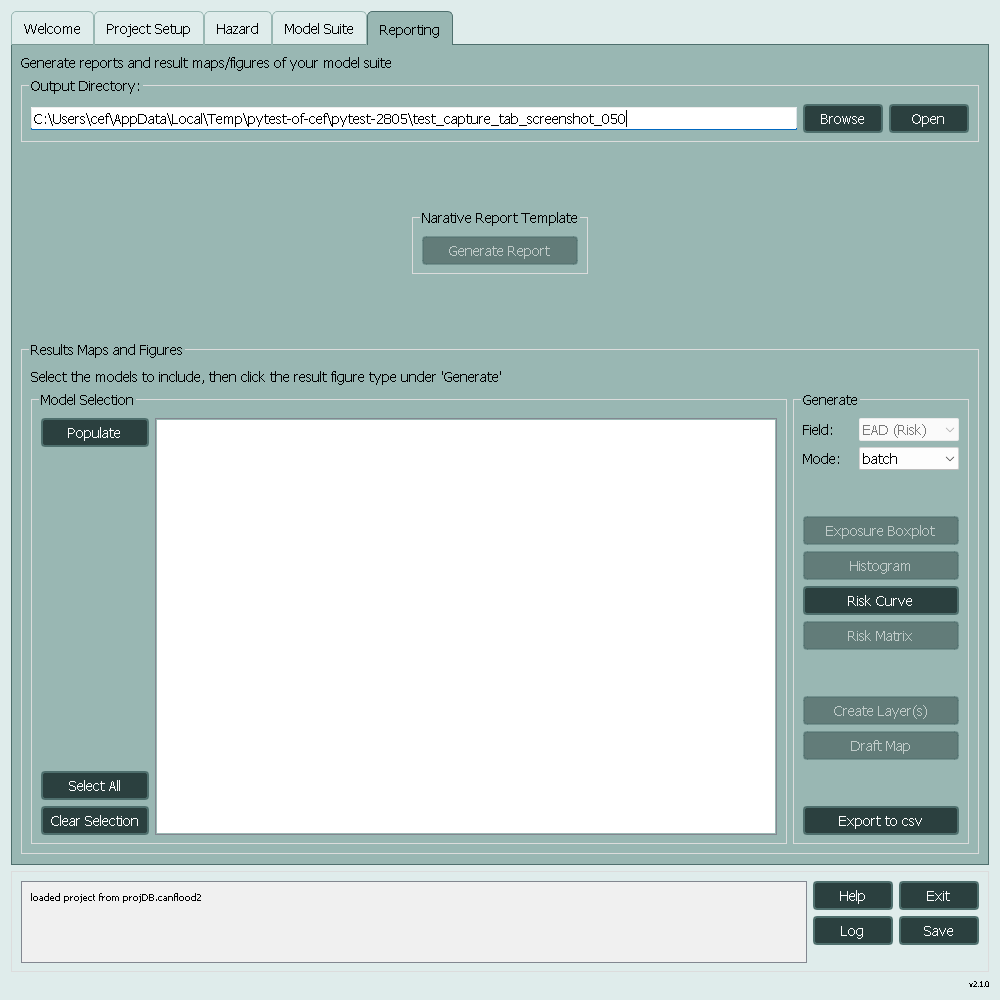
Figure 1.9 Reporting
See the User Guide and the Tutorials sections to learn more.
1.4. Frequently Asked Questions
is CanFlood a flood risk model?
No, it is a framework for building and running flood risk models.
What vulnerability functions should I use?
CanFlood2 does not include any vulnerability functions yet, but it can use any vulnerability function that is in the CanFlood format. See our sister project CanCurve for a tool to create CanFlood vulnerability functions.